Walkthrough 6-3: Track event data as it moves in and out of a Mule application
In this walkthrough, you call an external resource, which for simplicity is another HTTP Listener in the same application, so that you so you can watch event data as it moves in an out of a Mule application. You will:
· Create a second flow with an HTTP Listener.
· Make an HTTP request from the first flow to the new HTTP Listener.
· View the event data as it moves through both flows.
Note: You are making an HTTP request from one flow to another in this exercise only so you can watch the value of event data as it moves in and out of a Mule application. You will learn how to pass events between flows within and between Mule applications in the next module.
Starting file
If you did not complete walkthrough 6-1, you can get a starting file here. This file is also located in the solutions folder of the student files ZIP located in the Course Resources.
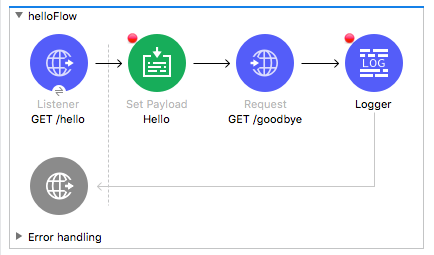
Create a second flow with an HTTP Listener
1. Return to apdev-examples.xml.
2. Drag an HTTP Listener from the Mule Palette and drop it in the canvas beneath the first flow.
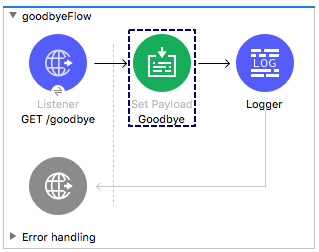
3. Change the name of the flow to goodbyeFlow.
4. In the Listener view, ensure the connector configuration is set to the existing HTTP_Listener_config.
5. Set the path to /goodbye and the allowed methods to GET.
6. Set the display name to GET /goodbye.
7. Add a Set Payload transformer and a Logger to the flow.
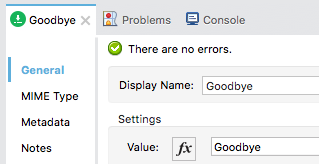
8. In the Set Payload properties view, set the display name and then use literal mode to set the value to Goodbye.
Make an HTTP request
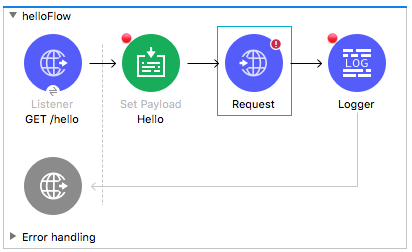
9. From the Mule Palette, drag an HTTP Request to the canvas and drop it before the Logger in helloFlow.
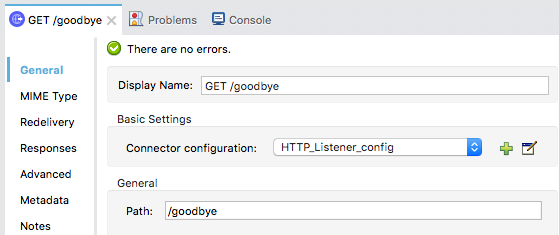
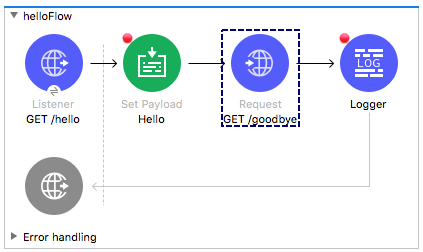
10. In the Request properties view, set the display name to GET /goodbye.
11. Set the path to /goodbye and leave the method set to GET.
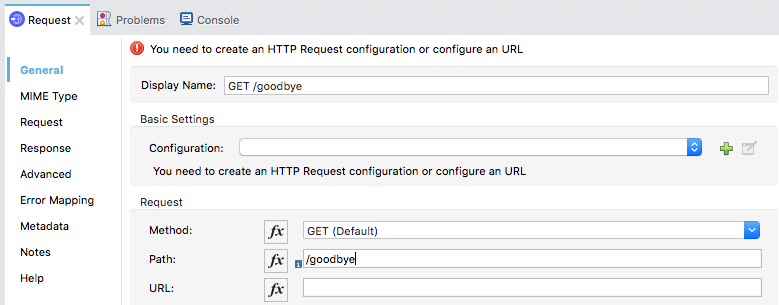
12. Click the Add button next to configuration.
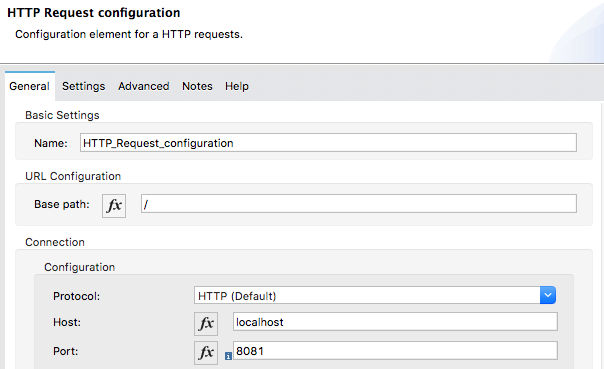
13. In the HTTP Request configuration dialog box, set the host to localhost and the port to 8081 and click OK.
View event structure and metadata in the DataSense Explorer
14. In the DataSense Explorer, examine Payload, Attributes, and HttpRequestAttributes on the Input tab.

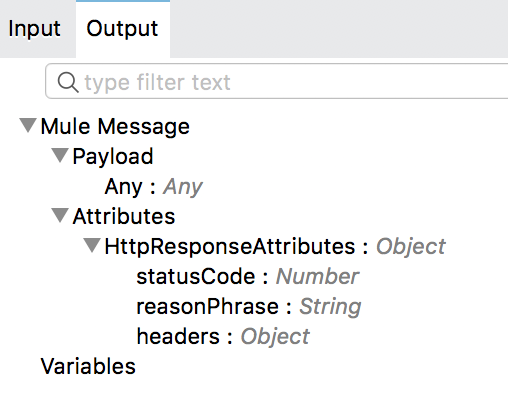
15. Select the Output tab and examine Payload, Attributes, and HttpResponseAttributes.
Change timeout for HTTP Request response
16. In the properties view for the GET /goodbye HTTP Request, click the Response tab.
17. Set the Response timeout to 300000.
Note: This is being set only for debugging purposes so that the HTTP Request does not timeout when you are stepping through the application and examining data in the Mule Debugger.
Debug the application
18. Save the file to redeploy the application.
19. In Advanced REST Client, send the same request to http://localhost:8081/hello?fname=max&lname=mule.
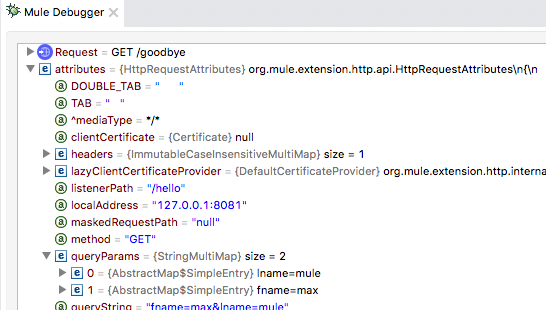
20. In the Mule Debugger, step to the GET /goodbye request.
21. Look at the values of the payload and the attributes, including the queryParams.
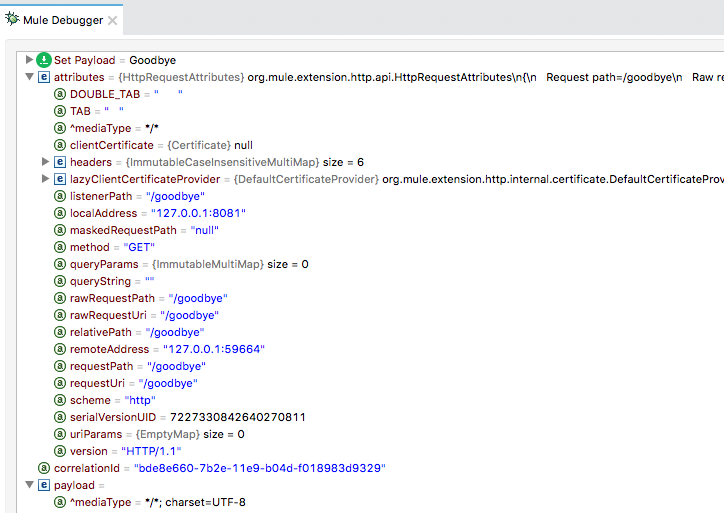
22. Step into goodbyeFlow.
23. Look at the values of the payload and the attributes.
24. Step through the flow until the event returns to the Logger in helloFlow.
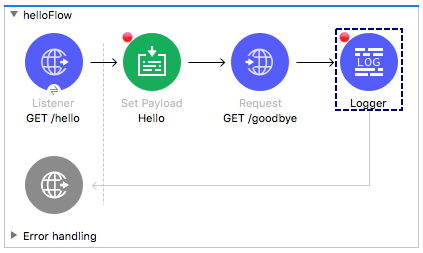
25. Look at the values of the payload and the attributes.

26. Step through the rest of the application.
Review response data
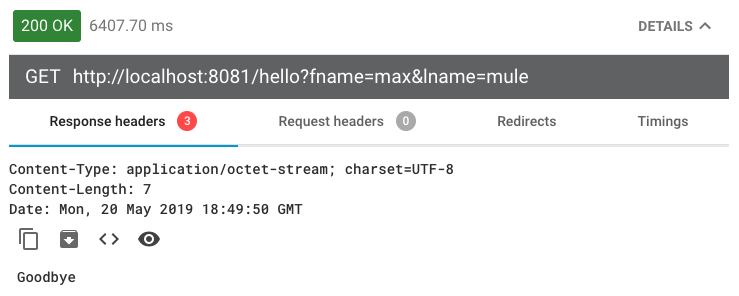
27. Return to Advanced REST Client and view the return data and the http status code.
28. Click the Details button on the right side to expand this section.
29. Look at the response headers; you should see content-length, content-type, and date headers.
30. Return to Anypoint Studio and switch to the Mule Design perspective.