Walkthrough 11-1: Create transformations with the Transform Message component
In this walkthrough, you create a new flow that receives flight POST requests that you will use as the input for writing transformations in the next several walkthroughs. You will:
· Create a new flow that receives POST requests of JSON flight objects.
· Add sample data and use live preview.
· Create a second transformation that stores the output in a variable.
· Save a DataWeave script in an external file.
· Review DataWeave script errors.
Starting file
If you did not complete the previous walkthrough, you can get a starting file here. This file is also located in the solutions folder of the student files ZIP located in the Course Resources.
Create a new flow that receives POST requests and returns the payload as Java
1. In the apdev-flights-ws Mule project, return to config.yaml.
2. Change the delta.wsdl property from /deltas?wsdl to /delta?wsdl.
3. Return to implementation.xml.
4. Right-click in the canvas and select Collapse All.
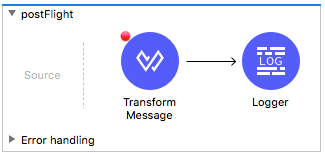
5. Drag a Transform Message component from the Mule Palette to the bottom of the canvas; a new flow should be created.
6. Change the name of the flow to postFlight.
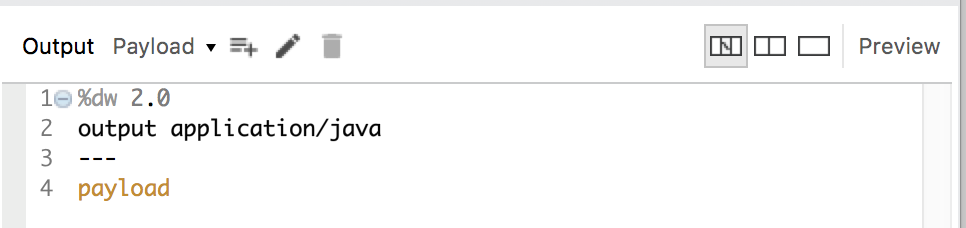
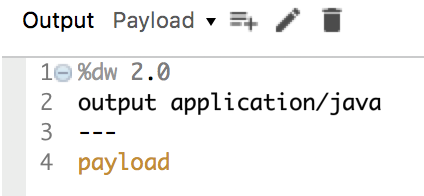
7. In the Transform Message properties view, set the expression to payload.
8. Add a breakpoint to the Transform Message component.
9. Add a Logger to the flow.
10. Return to interface.xml.
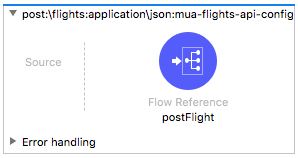
11. Locate the post:\flights:application\json:mua-flights-api-config flow.
12. Delete the Transform Message component and replace it with a Flow Reference.
13. In the Flow Reference properties view, set the flow name and display name to postFlight.
14. Save the files to redeploy the project in debug mode.
15. Close interface.xml.
Post a flight to the flow
16. Open flight-example.json in src/test/resources.
17. Copy the code and close the file.
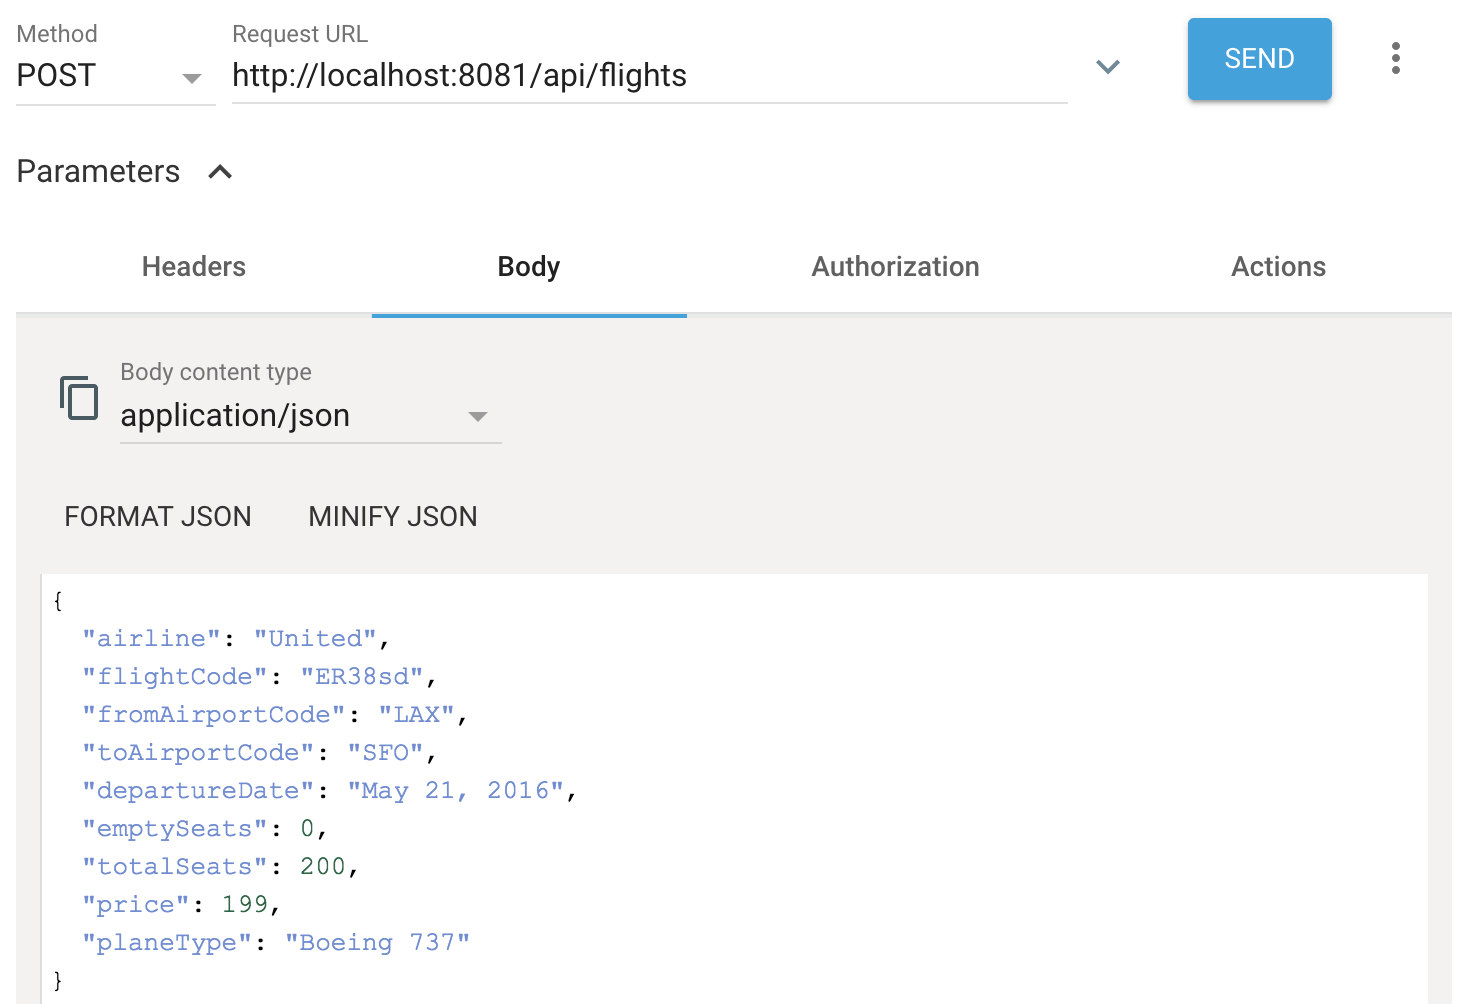
18. In Advanced REST Client, change the method to POST and remove any query parameters.
19. Add a request header called Content-Type and set it equal to application/json.
20. Set the request body to the value you copied from flight-example.json.
21. Make the request to http://localhost:8081/api/flights.
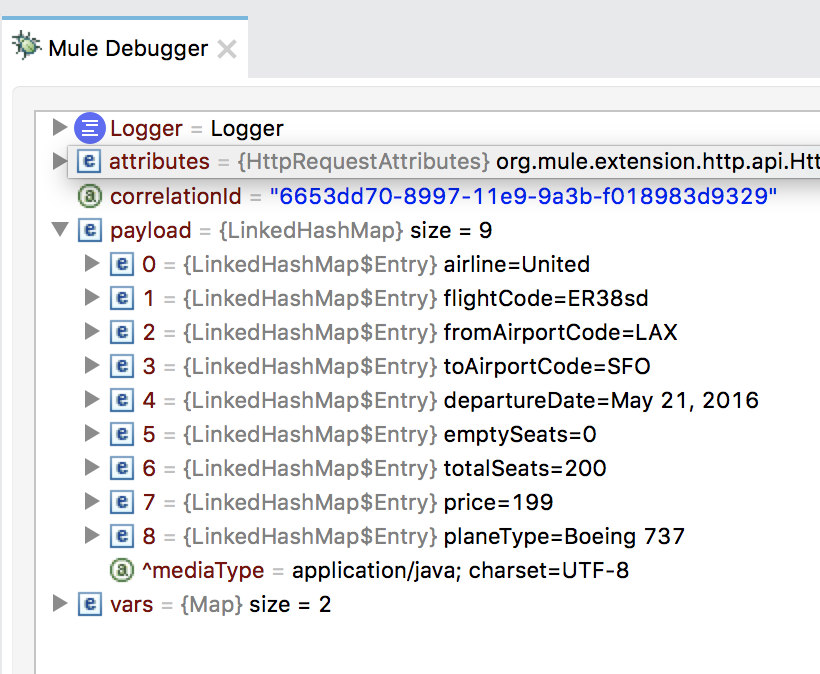
22. In the Mule Debugger, expand Attributes and locate the content-type header.
23. Review the payload; you should see it has a mime-type of application/json.
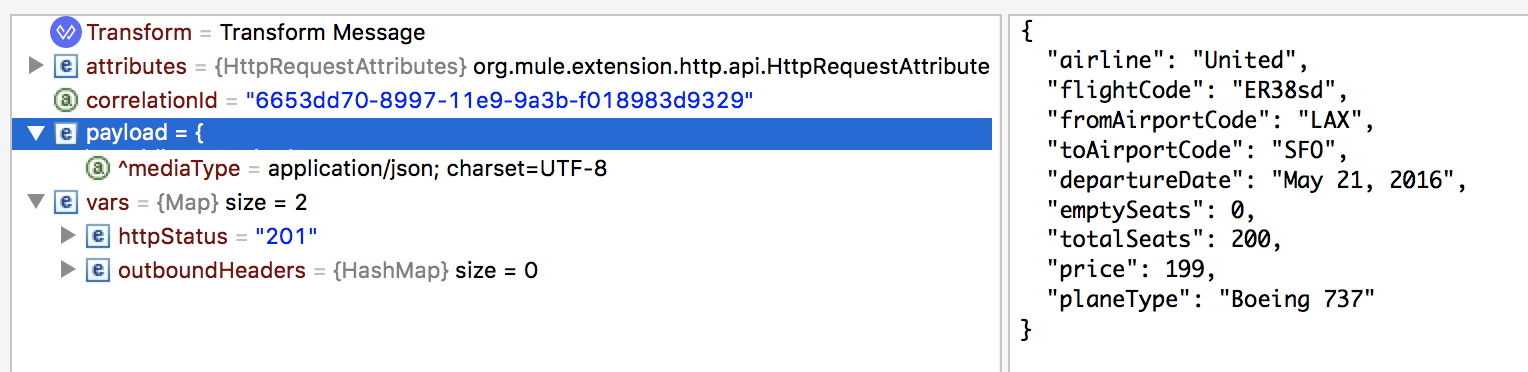
24. Step to the Logger; you should see the payload now has a mime-type of application/java and is a LinkedHashMap.
25. Step to the end of the application and switch perspectives.
Add input metadata for the transformation
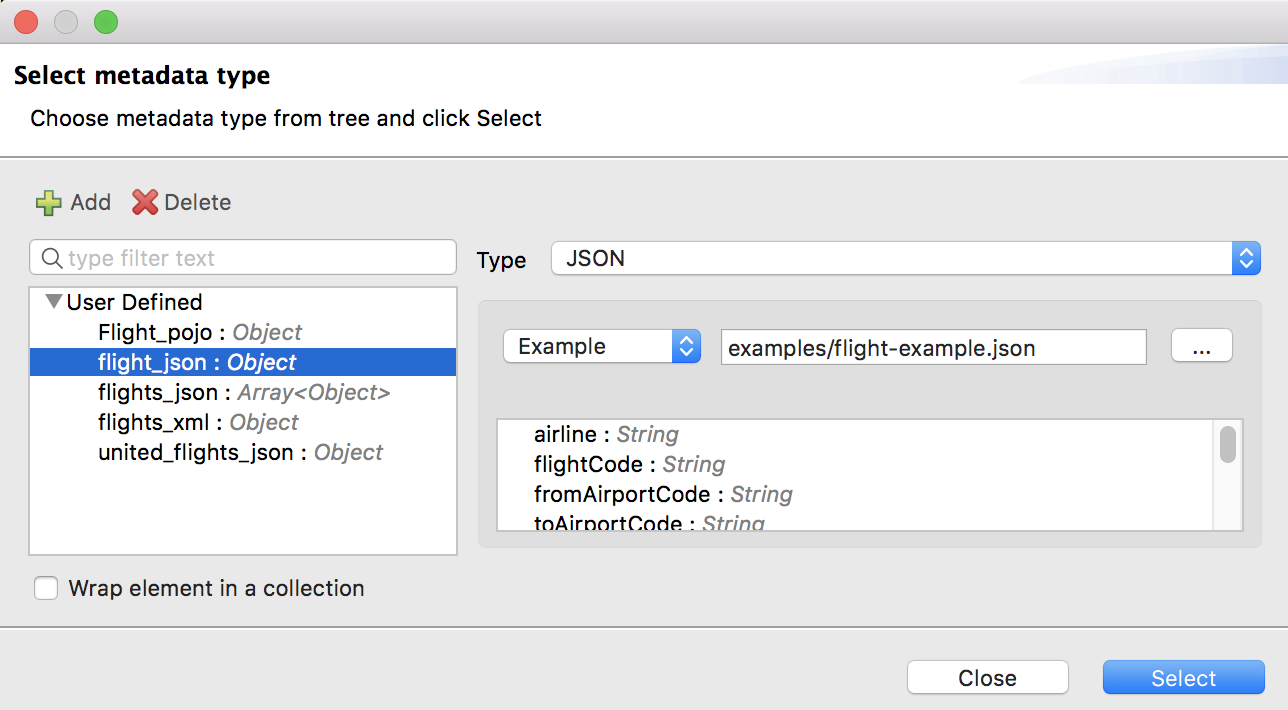
26. In the input section of the Transform Message properties view, click Define metadata for the payload.
27. In the Select metadata type dialog box, select flight_json and click Select.
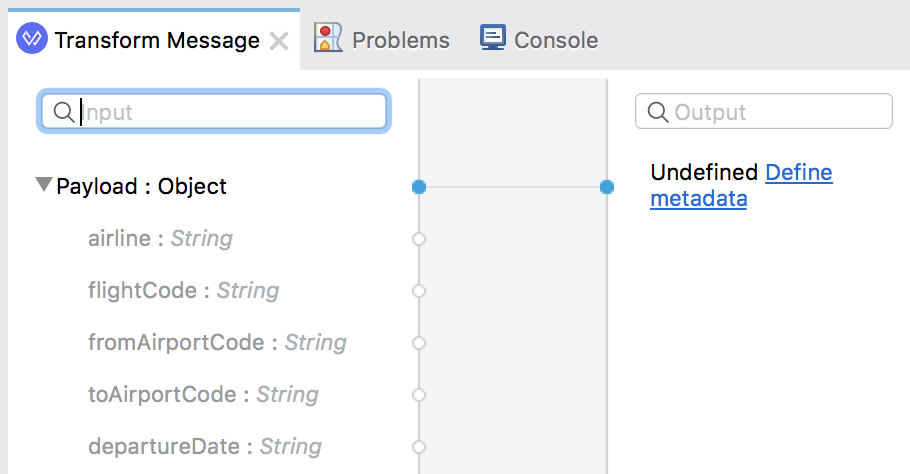
28. In the Transform Message Properties view, you should now see metadata for the input.
29. Open application-types.xml in src/main/resources.
30. Review the enrichment elements for flight_json.
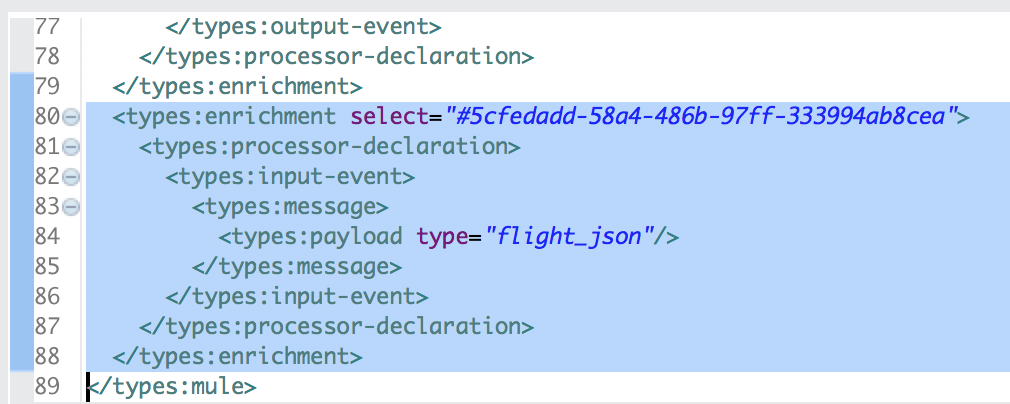
31. Close the file.
Preview sample data and sample output
32. In the input section of the Transform Message properties view, right-click the payload and select Edit Sample Data; you should see a new tab called payload and it should contain the sample input of type JSON.
33. Click the Preview button; you should see a new preview section and it should contain the sample output of type Java.
If sample data doesn't automatically appear in the preview section, click the Create required sample data to execute preview link.
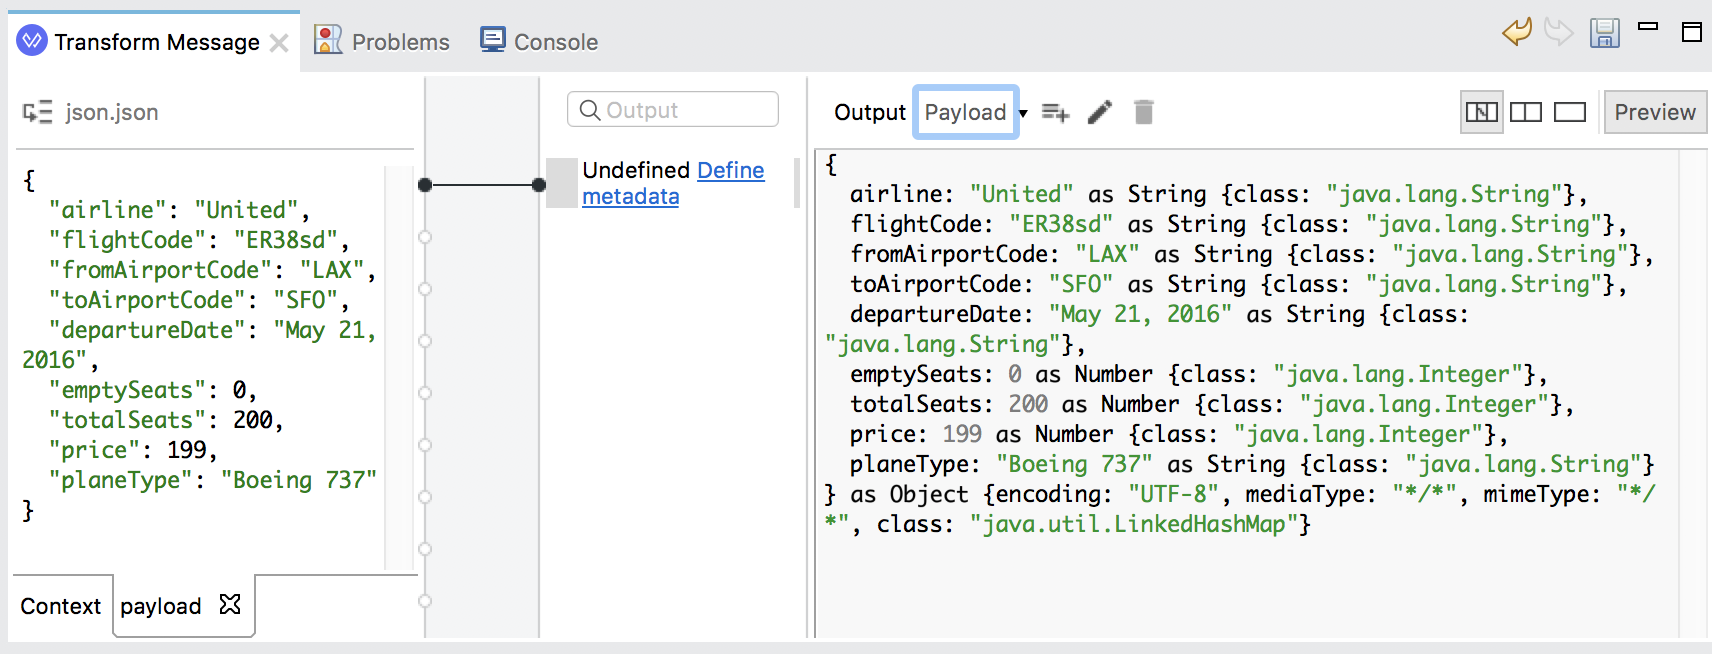
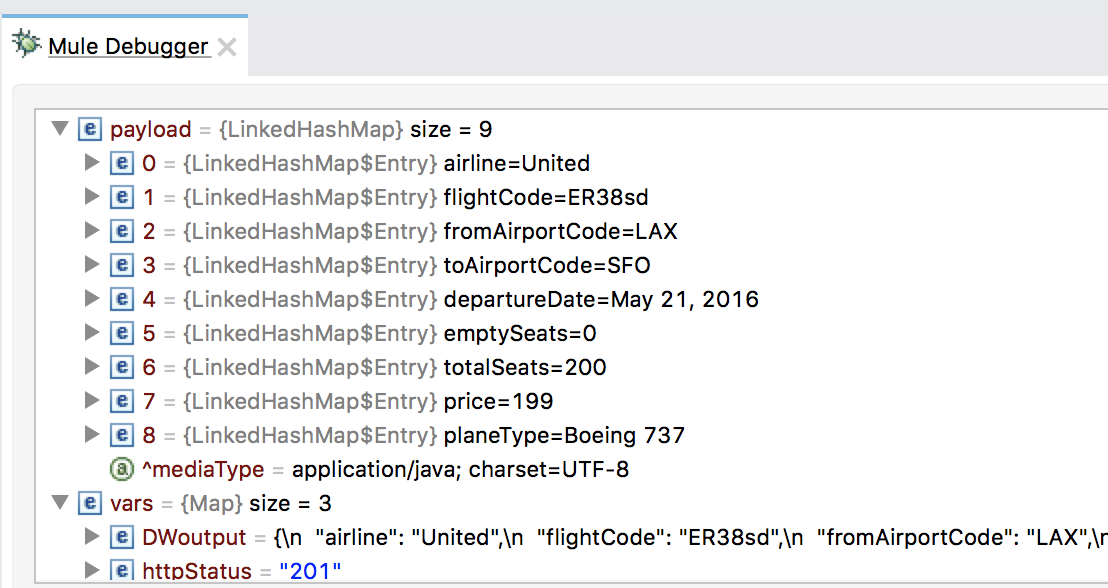
34. Click the Source Only button to the left of the Preview button.

Locate the new sample data file
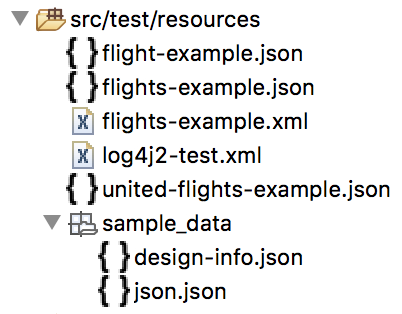
35. In the project explorer, locate the new sample_data folder in src/test/resources.
36. Open json.json.
37. Review the code and close the file.
Create a second transformation with the same component
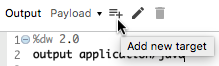
38. In the Transform Message properties view, click the Add new target button.
39. In the Selection dialog box, change the output to variable.
40. Set the variable name to DWoutput.
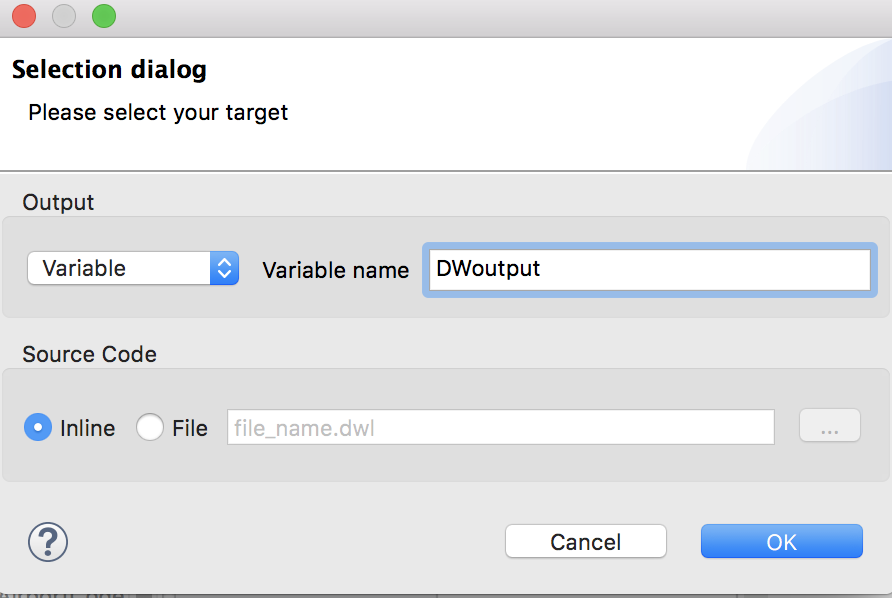
41. Click OK.
42. Click the drop-down menu for the output; you should see that you can switch between the two transformations.
43. For the new transformation, set the output type to json and set the expression to payload.

Test the application
44. Save the file to redeploy the project in debug mode.
45. In Advanced REST Client, post the same request to http://localhost:8081/api/flights.
46. In the Mule Debugger, step to the Logger.
47. Review Payload; it should be Java as before.
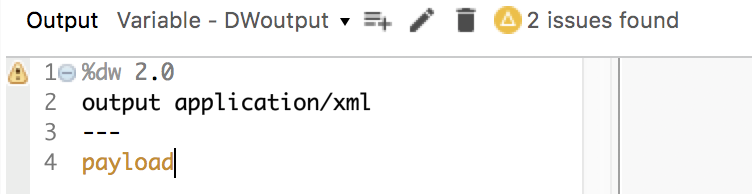
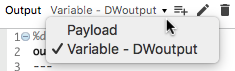
48. Expand Variables; you should see the new DWoutput variable.
49. Step through the rest of the application and switch perspectives.
Review the Transform Message XML code
50. Right-click the Transform Message component and select Go to XML.
51. Locate and review the code for both DataWeave transformations.
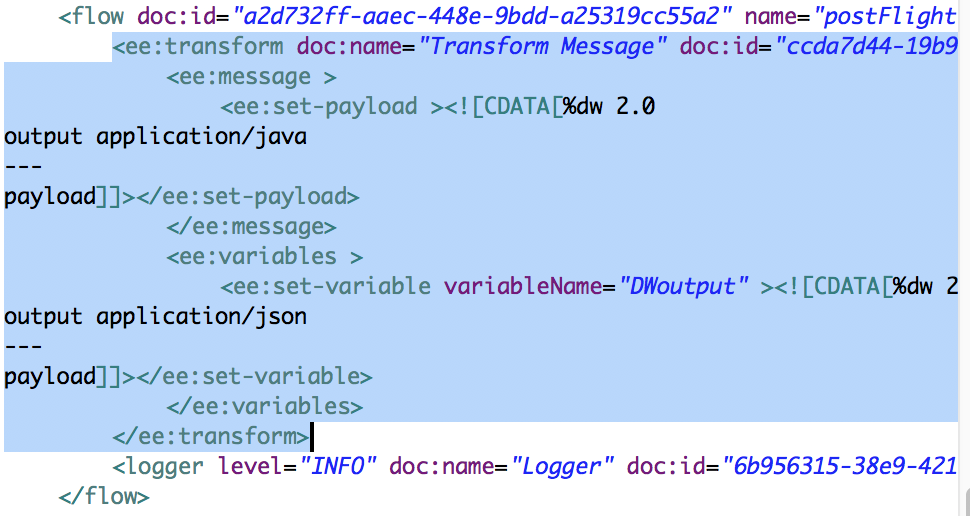
52. Switch back to the Message Flow view.
Save a DataWeave script to an external file
53. In the Transform Message Properties view, make sure the payload output expression is selected.
54. Click the Edit current target button (the pencil) above the code.
55. In the Selection dialog box, change the source code selection from inline to file.
56. Set the file name to json_flight_playground.
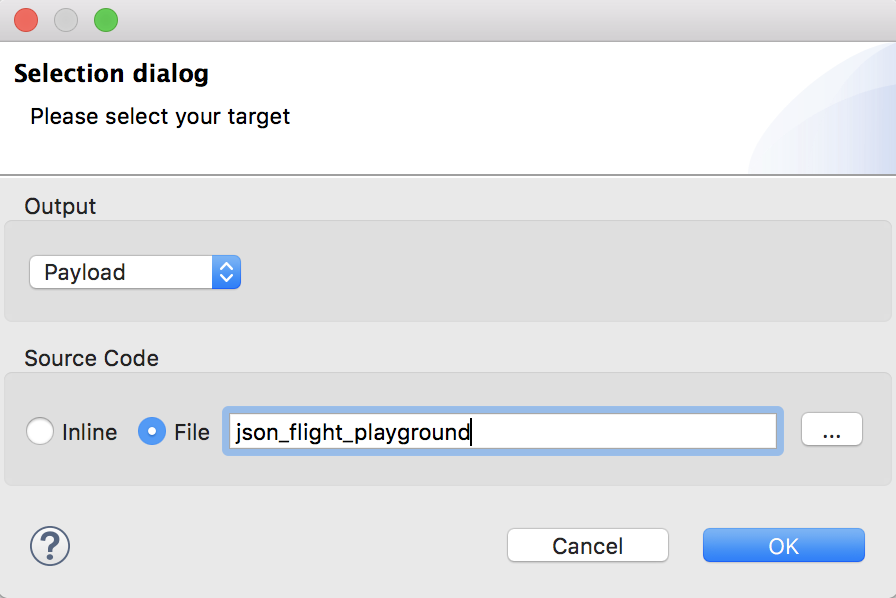
57. Click OK.
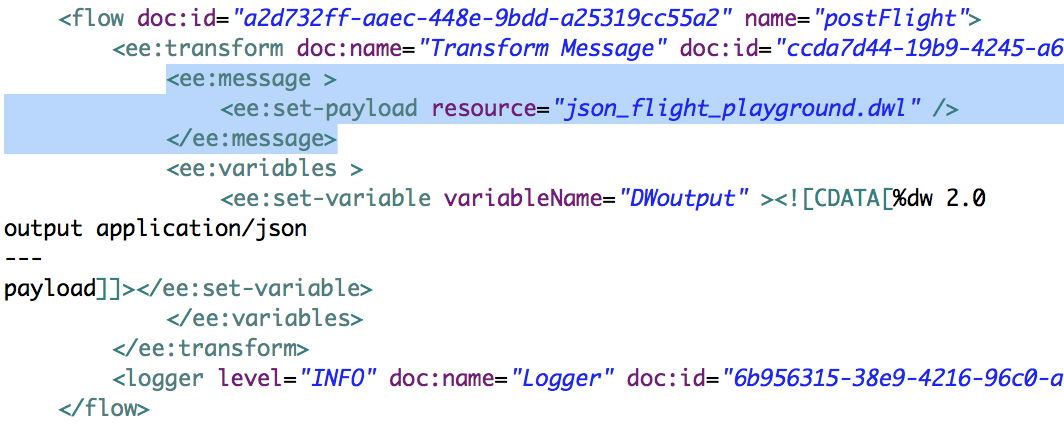
Locate and review the code that uses an external DataWeave script
58. Switch to Configuration XML view.
59. Locate the new code for the transformation in postFlight.
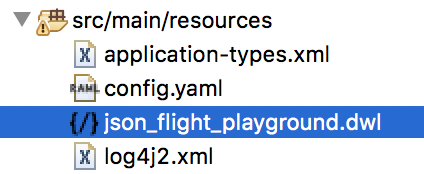
60. In the Package Explorer, expand src/main/resources.
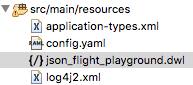
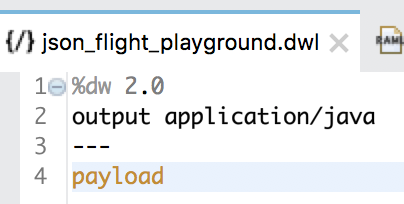
61. Open json_flight_playground.dwl.
62. Review and then close the file.
63. Return to Message Flow view in implementation.xml.
Change the output type to XML and review errors
64. In the Transform Message properties view, select the Variable – DWoutput output.
65. Change the output type from application/json to application/xml.
66. Locate the warning icons indicating that there is a problem.
Note: If you do not see the warnings, click the Preview button. If you do not see a data preview, select the payload tab in the input section. If you don’t see the payload tab, right-click payload in the input section and select Edit Sample Data.
67. Mouse over the icon located to the left of the code; you should see a message that there was an exception trying to output the second root <flightCode>.
68. Click the icon above the code; a List of errors dialog box should open.
69. Select and review the first issue.
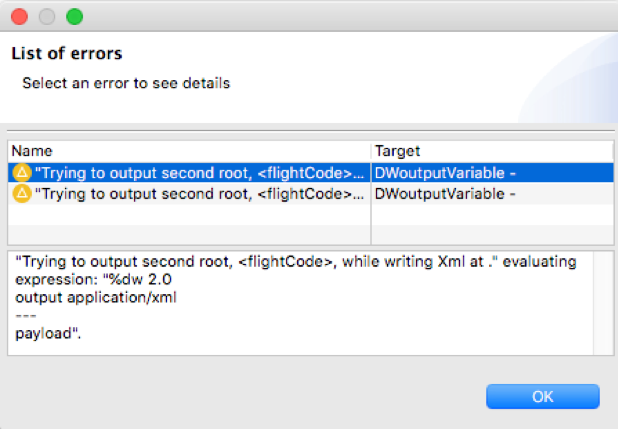
70. In the List of errors dialog box, click OK.
Note: You will learn how to successfully transform to XML in the next walkthrough.
Test the application
71. Save the file to redeploy the project in debug mode.
72. In Advanced REST Client, post the same request to http://localhost:8081/api/flights.
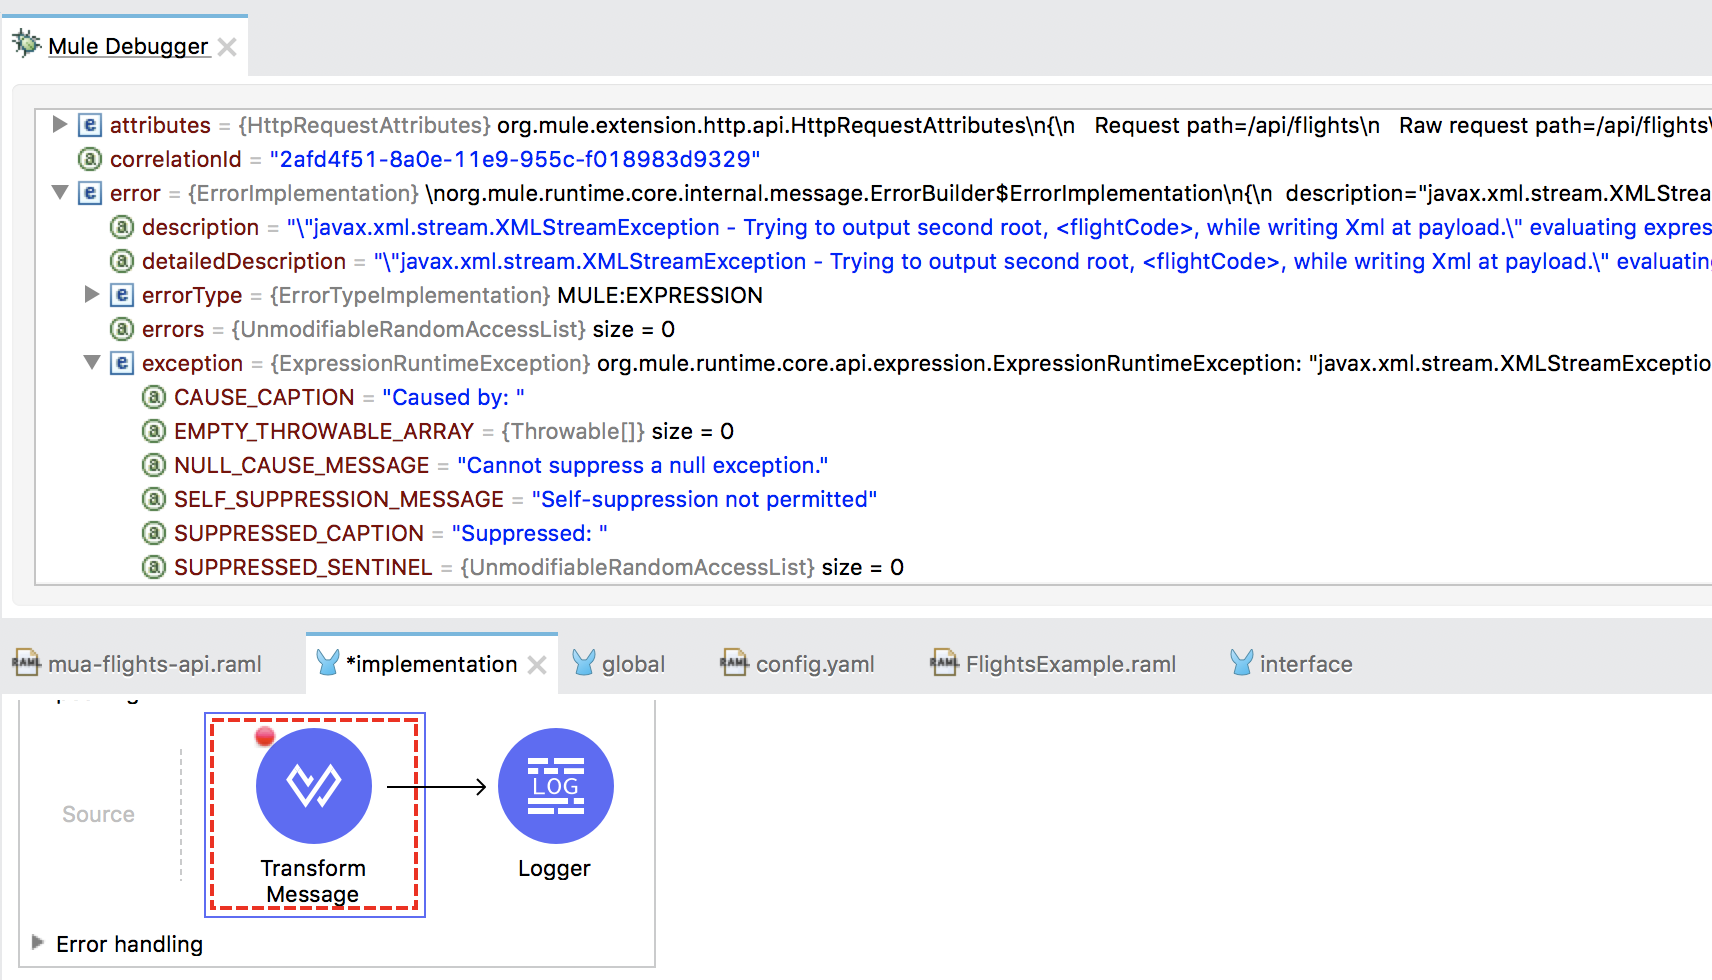
73. In the Mule Debugger, step once; you should get an error.
74. Expand the error and review the error information; you should see there is a DataWeave error when trying to output the second root.
75. Step to the end of the application and switch perspectives.